
You Are My Anchor Card Kit
From June 1st we have a new line from Stampin’ Up! The Kits Collection will be an ongoing and evolving set of ‘All Inclusive Kits’ aimed at the new stamper or for stamping on the go. These are great to give as gifts or to take on a trip or to craft with children or grandchildren. There are a selection that contain an ink spot, an acrylic block and a stamp set priced at £18, an amazing price point as these three elements can continue to be used long after the consumables are used. There are also some kits that contain diecut sentiments so there is no stamping and these just contain all the elements to make the projects and these are just £11.25.
These kits are so very affordable and are great for those that have never crafted or deem themselves to ‘not be creative’ there are great visual instructions as well as written text and the kits can be created in a short timeframe without any other supplies as even the adhesives are included. Did I mention these are great to take on a trip or while you are sat in the car waiting for your childs sports class to take place?
I think these would also make for a great craft night with friends, sat in the garden with a cocktail or two catching up on all that we have been missing since we were unable to meet. everyone could choose a kit relevant to their personal taste and then craft, laugh and enjoy!
Today I am taking part in a Blog Hop with a group of Stampin’ Up! Demonstrators from around the globe to show you how useful these Kit Stamp Sets are after all your consumables have been used up. I used the ‘You Are My Anchor Card Kit’ and what a fabulous kit it is. Not only does it make some super cute cards but it also has boxes to put together to gift the cards. The colours in this kit are: Calypso Coral, Pacific Point and Pool Party and it is gorgeous. You can purchase in my store by clicking on the image below or via the shopping list link further down this post.


Once you have made all these fabulous projects then the stamps, ink and block are just waiting for you to grab a few supplies and continue to craft, after all this stamp set has the most fabulous font and the lighthouse and anchor are great focal images and all those little accent boats, starfish and even little waves and seagulls, I love these designs so much…..

I’ve created a few cards for today’s hop my first one is using a watercolour wash technique that I’m using a lot right now. it’s a simple but effective technique and each time you try this you will get a different result, but this adds to the unique look of the card that you make, no two will ever be the same!

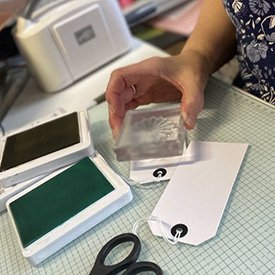
I use a piece of acetate I use the one that comes in the newly configured Polymer stamp sets as now I love that we can take the stamps from this sheet and place them on the reversed images inside the case. If you dont have this then you can use a plastic page protector or a plastic food bag, it helps if it is a thicker type of plastic. Using your ink spot apply some ink on the plastic sheet, how much you place down will affect how dark your ‘wash’ will appear in the background. Spritz on some water until the ink starts to move on the plastic. This part is trial and error you dont want it to be too runny but also not too dry. I cut a panel of Basic White Card, you can use Shimmery White Card as this will accept more water. You can either place your basic white card on top of the plastic and leave it there until it absorbs the ink or if you are using the acetate sheet I like to pick the acetate up and ‘smoosh’ it onto the card panel this allows me to repeat the process to add more ink here and there without over-wetting the card. The card will warp at this point but we can fix that later with using a good adhesive bond to our card base.
Once the ink wash panel has dried I stamped the small anchor stamp randomly using the ink spot on the background and then spattered the background using an old pain brush again use the acetate piece with more ink and a little water. I added Real Red card stock strips to a piece of white and then cut out a tag using the Tailored Tag dies, stamped the lighthouse with my ink spot and cut it out. I used the Pacific Point card to white heat emboss the sentiment and snipped it up to add to the card. Before I stuck down the ink washed panel I used a matching stampin write marker and ran it around the card edges, this is a great trick to make a white on white layer pop, without having to mat it on a coloured layer. It makes the panel stand out from the card without adding weight too!
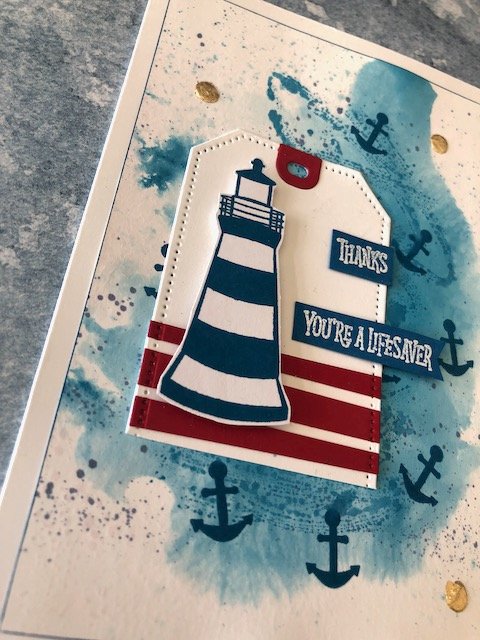
The gold accents are a trick I love using, can you believe that these are just our glue dots pressed onto the card and using my fingers I then carefully placed a little piece of Gilded Leafing on top and rub carefully, I removed the excess gently with a sponge dauber and voila a stunning accent with no bulk.
Here are the other cards I made during my crafting session with this fun stamp set, I again used the Tailored Tags and another stand alone die set that’s just arrived in the Stampin Spot, the ‘Stitched With Whimsy’ dies these are some fabulous dies that add a quirky stitched element that I then accentuated with markers on the Grey Granite Card I used the white Chalk Marker and on the Blue card I used the Pacific Point marker. i loved adding the twine too as this gave the illusion that there was in fact stitching and the bow finished off that stitching.

I really hope that you enjoyed these ideas with this great stamp set and that you might consider one of these kits if you are either new to crafting or would like an all inclusive project to craft on the go. Using the list below you can hop around and get some more ideas from my demo friends around the world of what you might do with your stamps after the initial kit is complete. Enjoy the inspiration.
Thanks for dropping by
Bel x
Product List


Super cute alternative projects!! I love them!
Love the watercolor wash for your blue lifesaver card with the splatter of anchors… just made me smile! The whimsical stitching around the tags for the red lighthouse cards was a nice touch. Thanks for the inspirations for this fun kit!
I love this kit and your alternative projects are just adorable.
Thanks Sara x
Fun cards especially for the summer months!!!